> ## Documentation Index
> Fetch the complete documentation index at: https://www.thundercompute.com/docs/llms.txt
> Use this file to discover all available pages before exploring further.
# Quickstart
> Launch your first instance using the Thunder Compute Console. A web interface to provision cloud GPU resources and initialize environments.
export const QuickstartCard = ({ title, icon, href, children, selected }) => {
const enter = e => { if (selected) return; const el = e.currentTarget; el.style.borderColor = '#555'; el.querySelector('[data-title]').style.color = '#fff'; el.querySelector('[data-sub]').style.opacity = '0.7'; el.querySelector('[data-icon]').style.opacity = '0.7'; };
const leave = e => { if (selected) return; const el = e.currentTarget; el.style.borderColor = '#333'; el.querySelector('[data-title]').style.color = ''; el.querySelector('[data-sub]').style.opacity = '0.5'; el.querySelector('[data-icon]').style.opacity = '0.35'; };
return (
);
};
Editor extension
Command line
Web interface
MCP server
## Sign Up
Navigate to the [Thunder Compute console](https://console.thundercompute.com/signup) and create an account with your email.
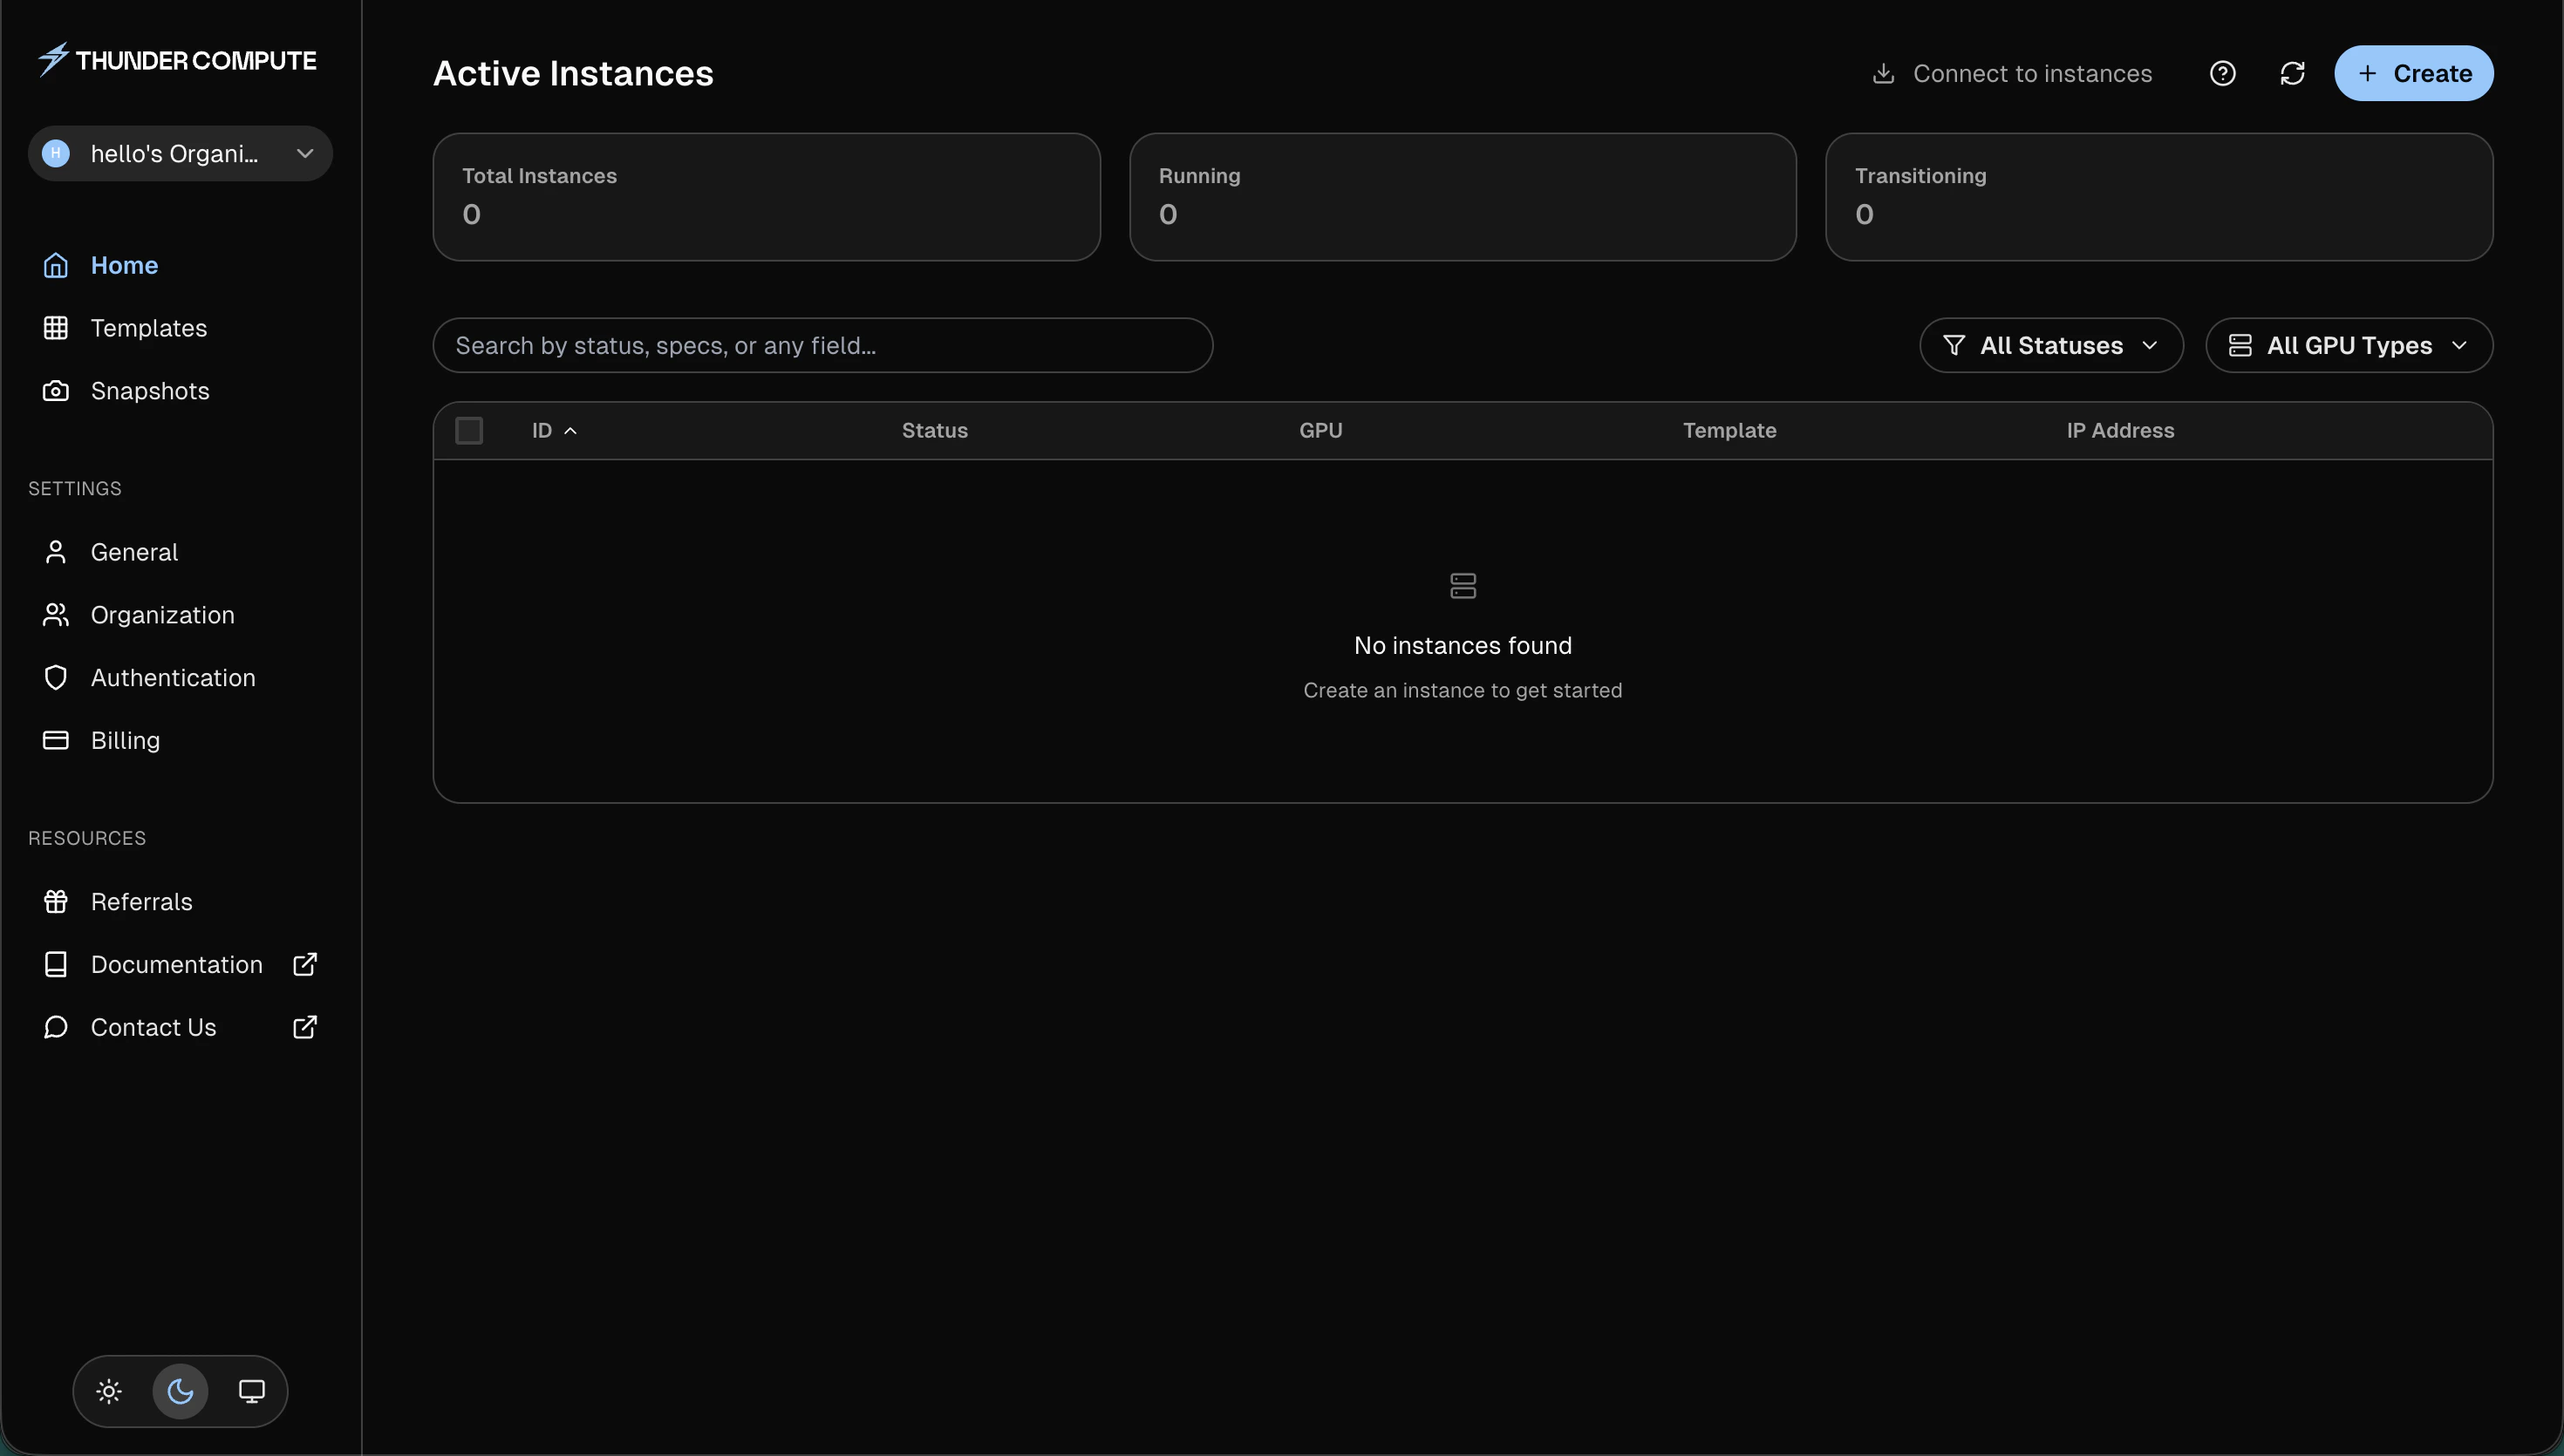
After signing in, the console opens to **Active Instances**, where you can create and manage GPU instances.
 ## Add a Payment Method
In the console, [add a payment method](https://console.thundercompute.com/settings/billing) to your account.
## Create an Instance
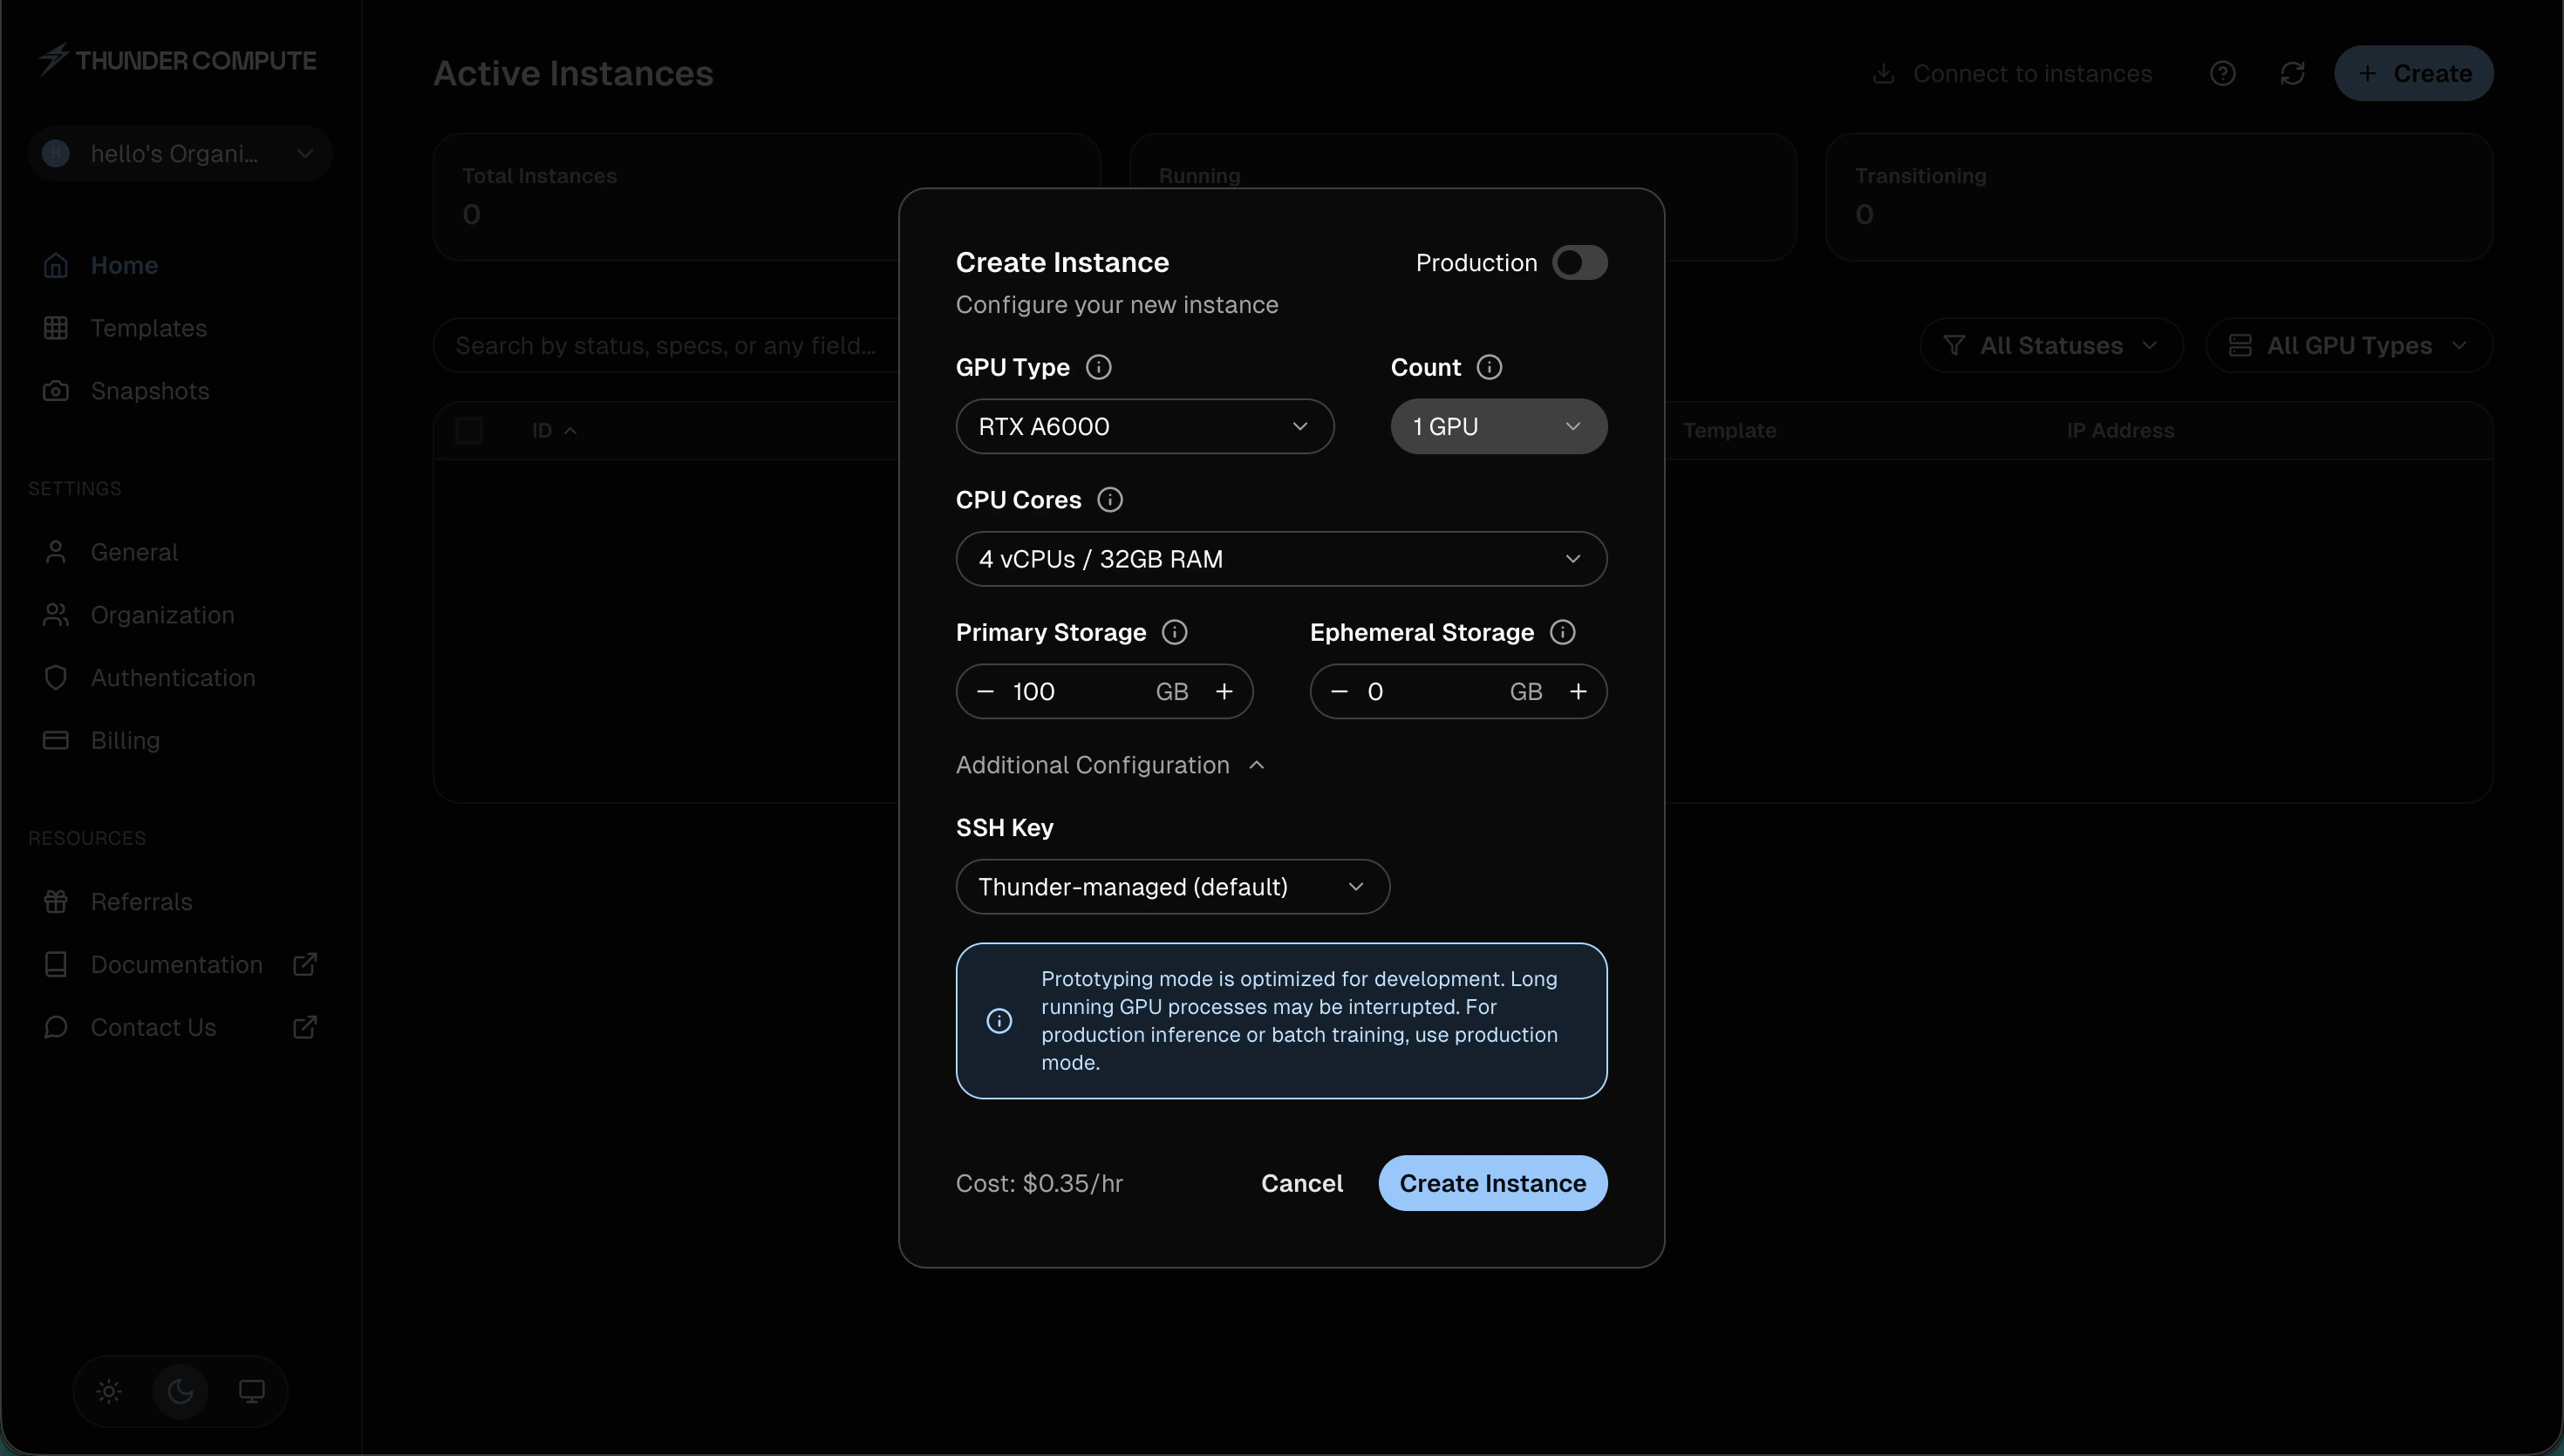
1. Click **Create** on the dashboard
2. Select a GPU type, GPU count, CPU/RAM, and storage
3. Under **Additional Configuration**, choose an SSH key. **Thunder-managed (default)** is the fastest way to get started
4. Click **Create Instance**
## Add a Payment Method
In the console, [add a payment method](https://console.thundercompute.com/settings/billing) to your account.
## Create an Instance
1. Click **Create** on the dashboard
2. Select a GPU type, GPU count, CPU/RAM, and storage
3. Under **Additional Configuration**, choose an SSH key. **Thunder-managed (default)** is the fastest way to get started
4. Click **Create Instance**
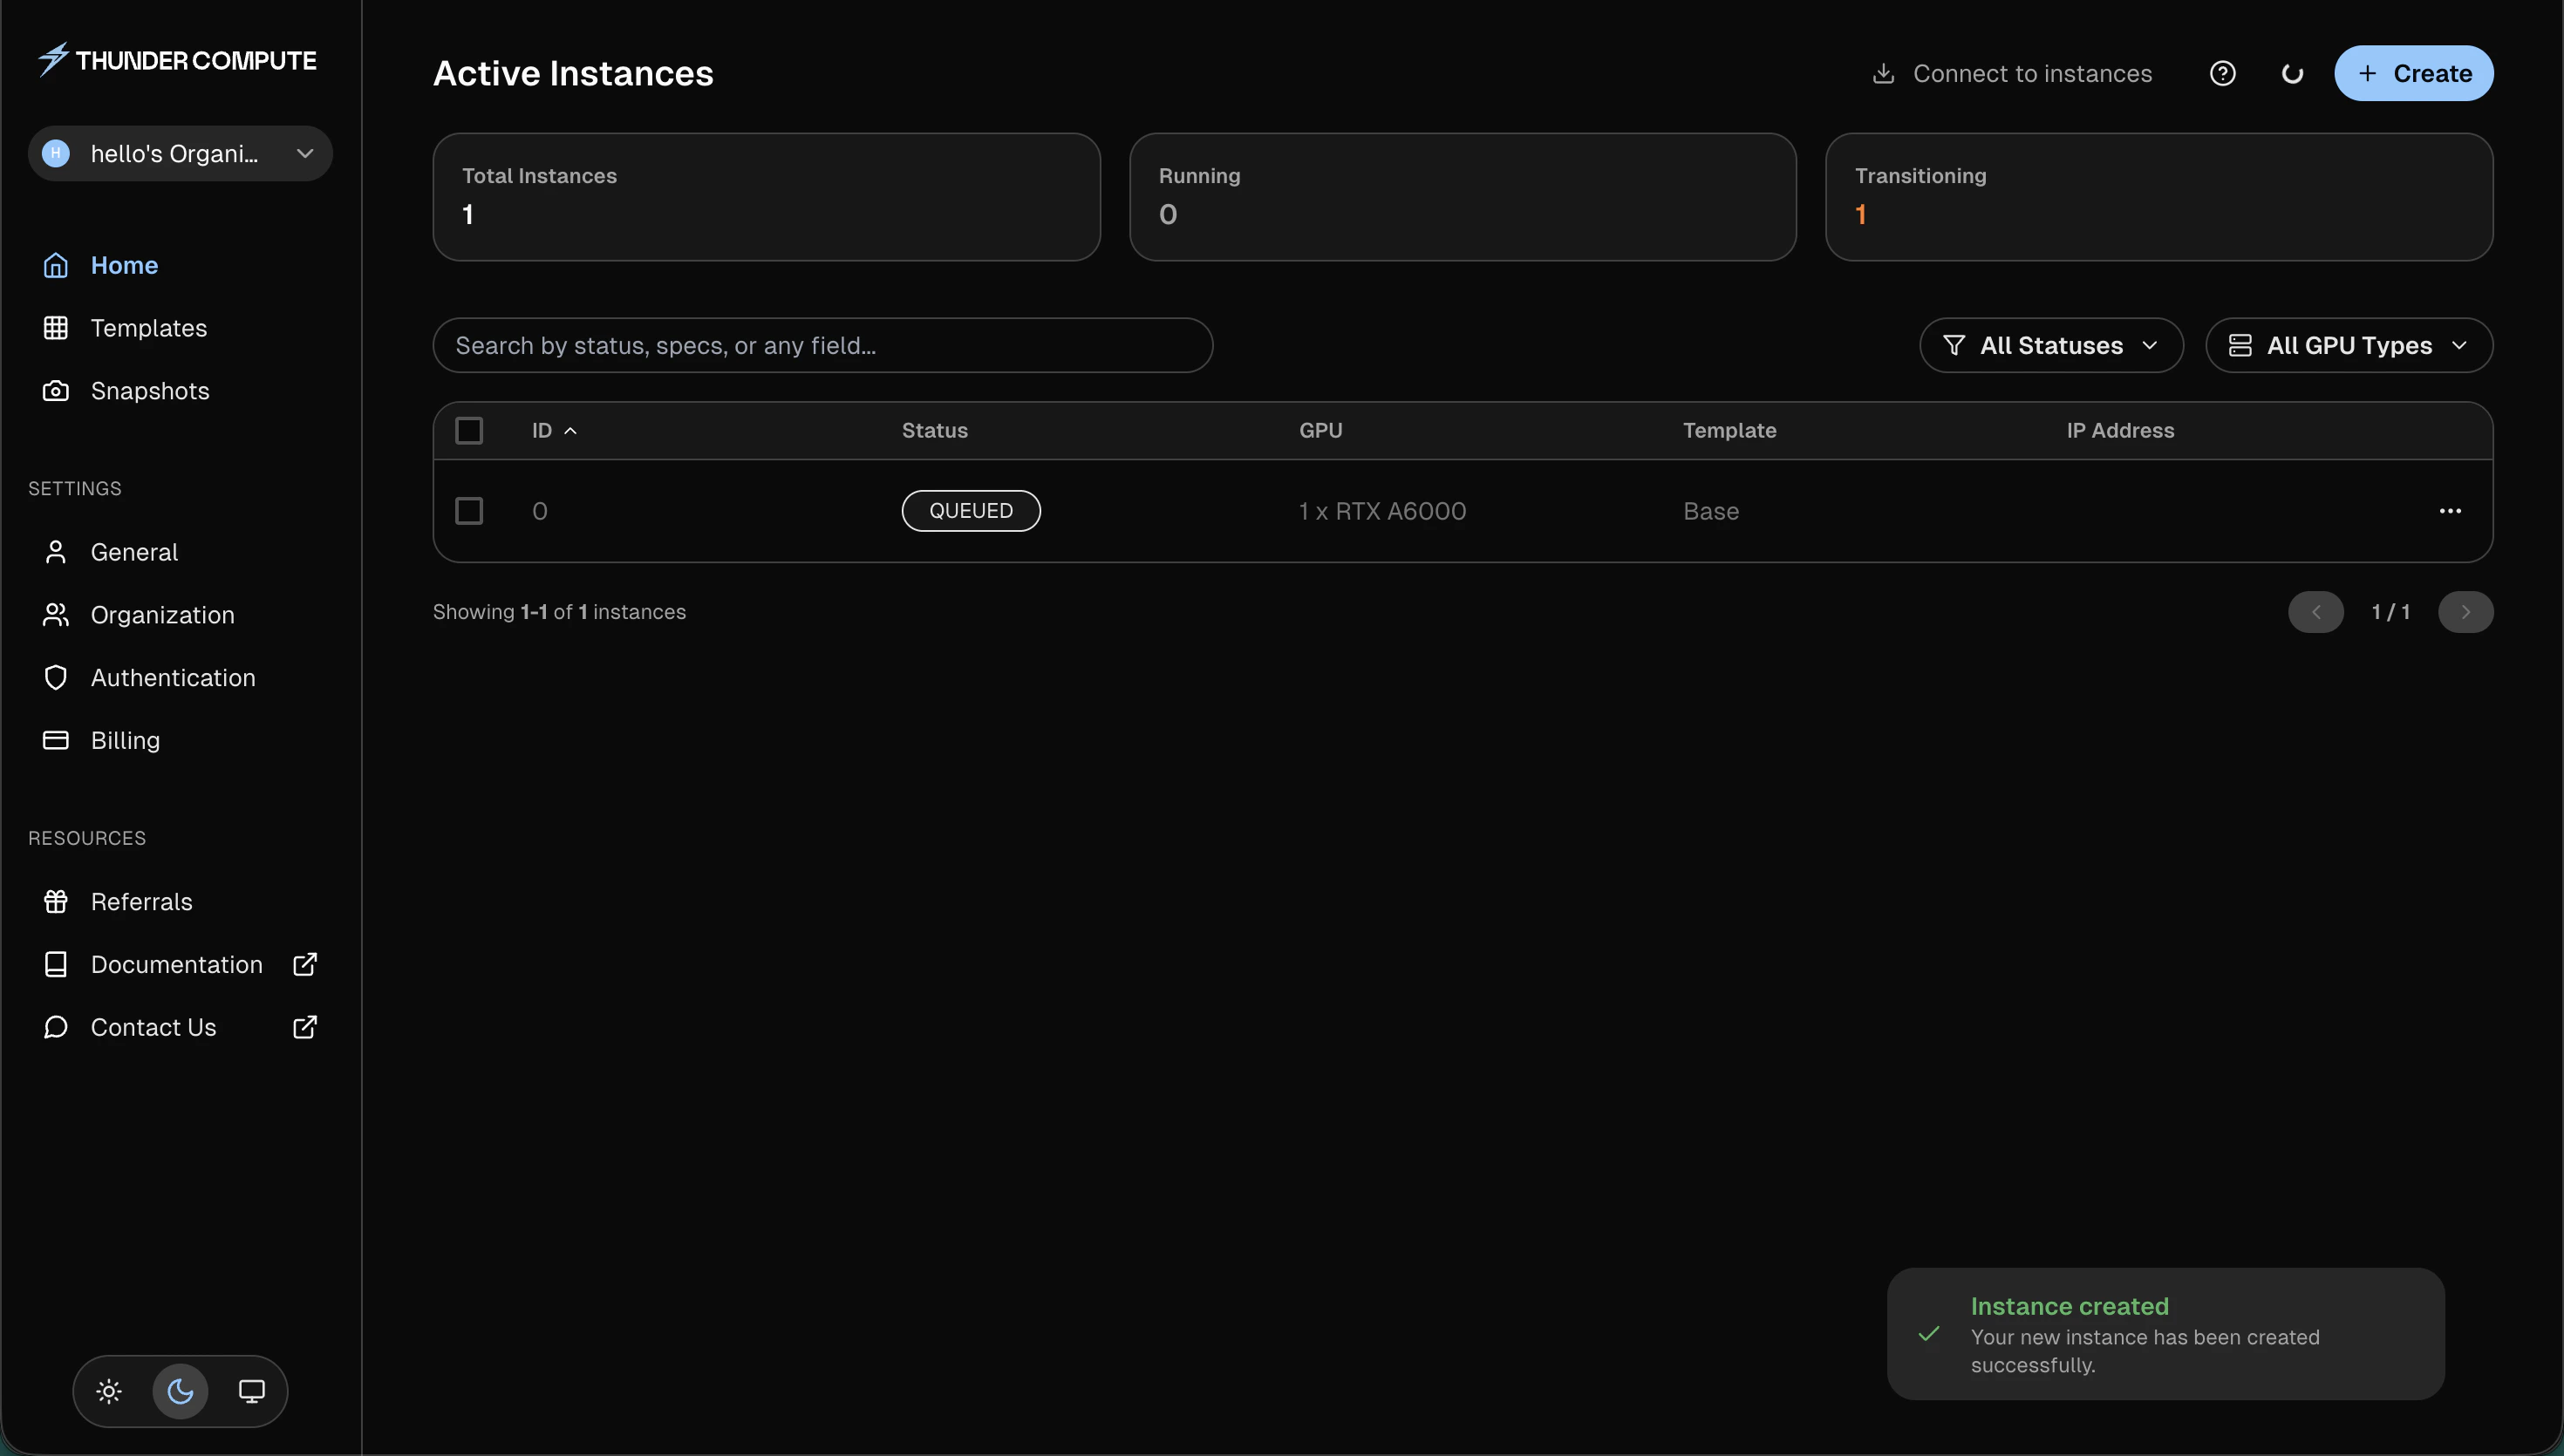
 Your instance appears in the **Active Instances** table. It may briefly show **Queued** or **Starting** before it becomes **Running**.
 When the instance is running, the table shows its GPU, template, and IP address.
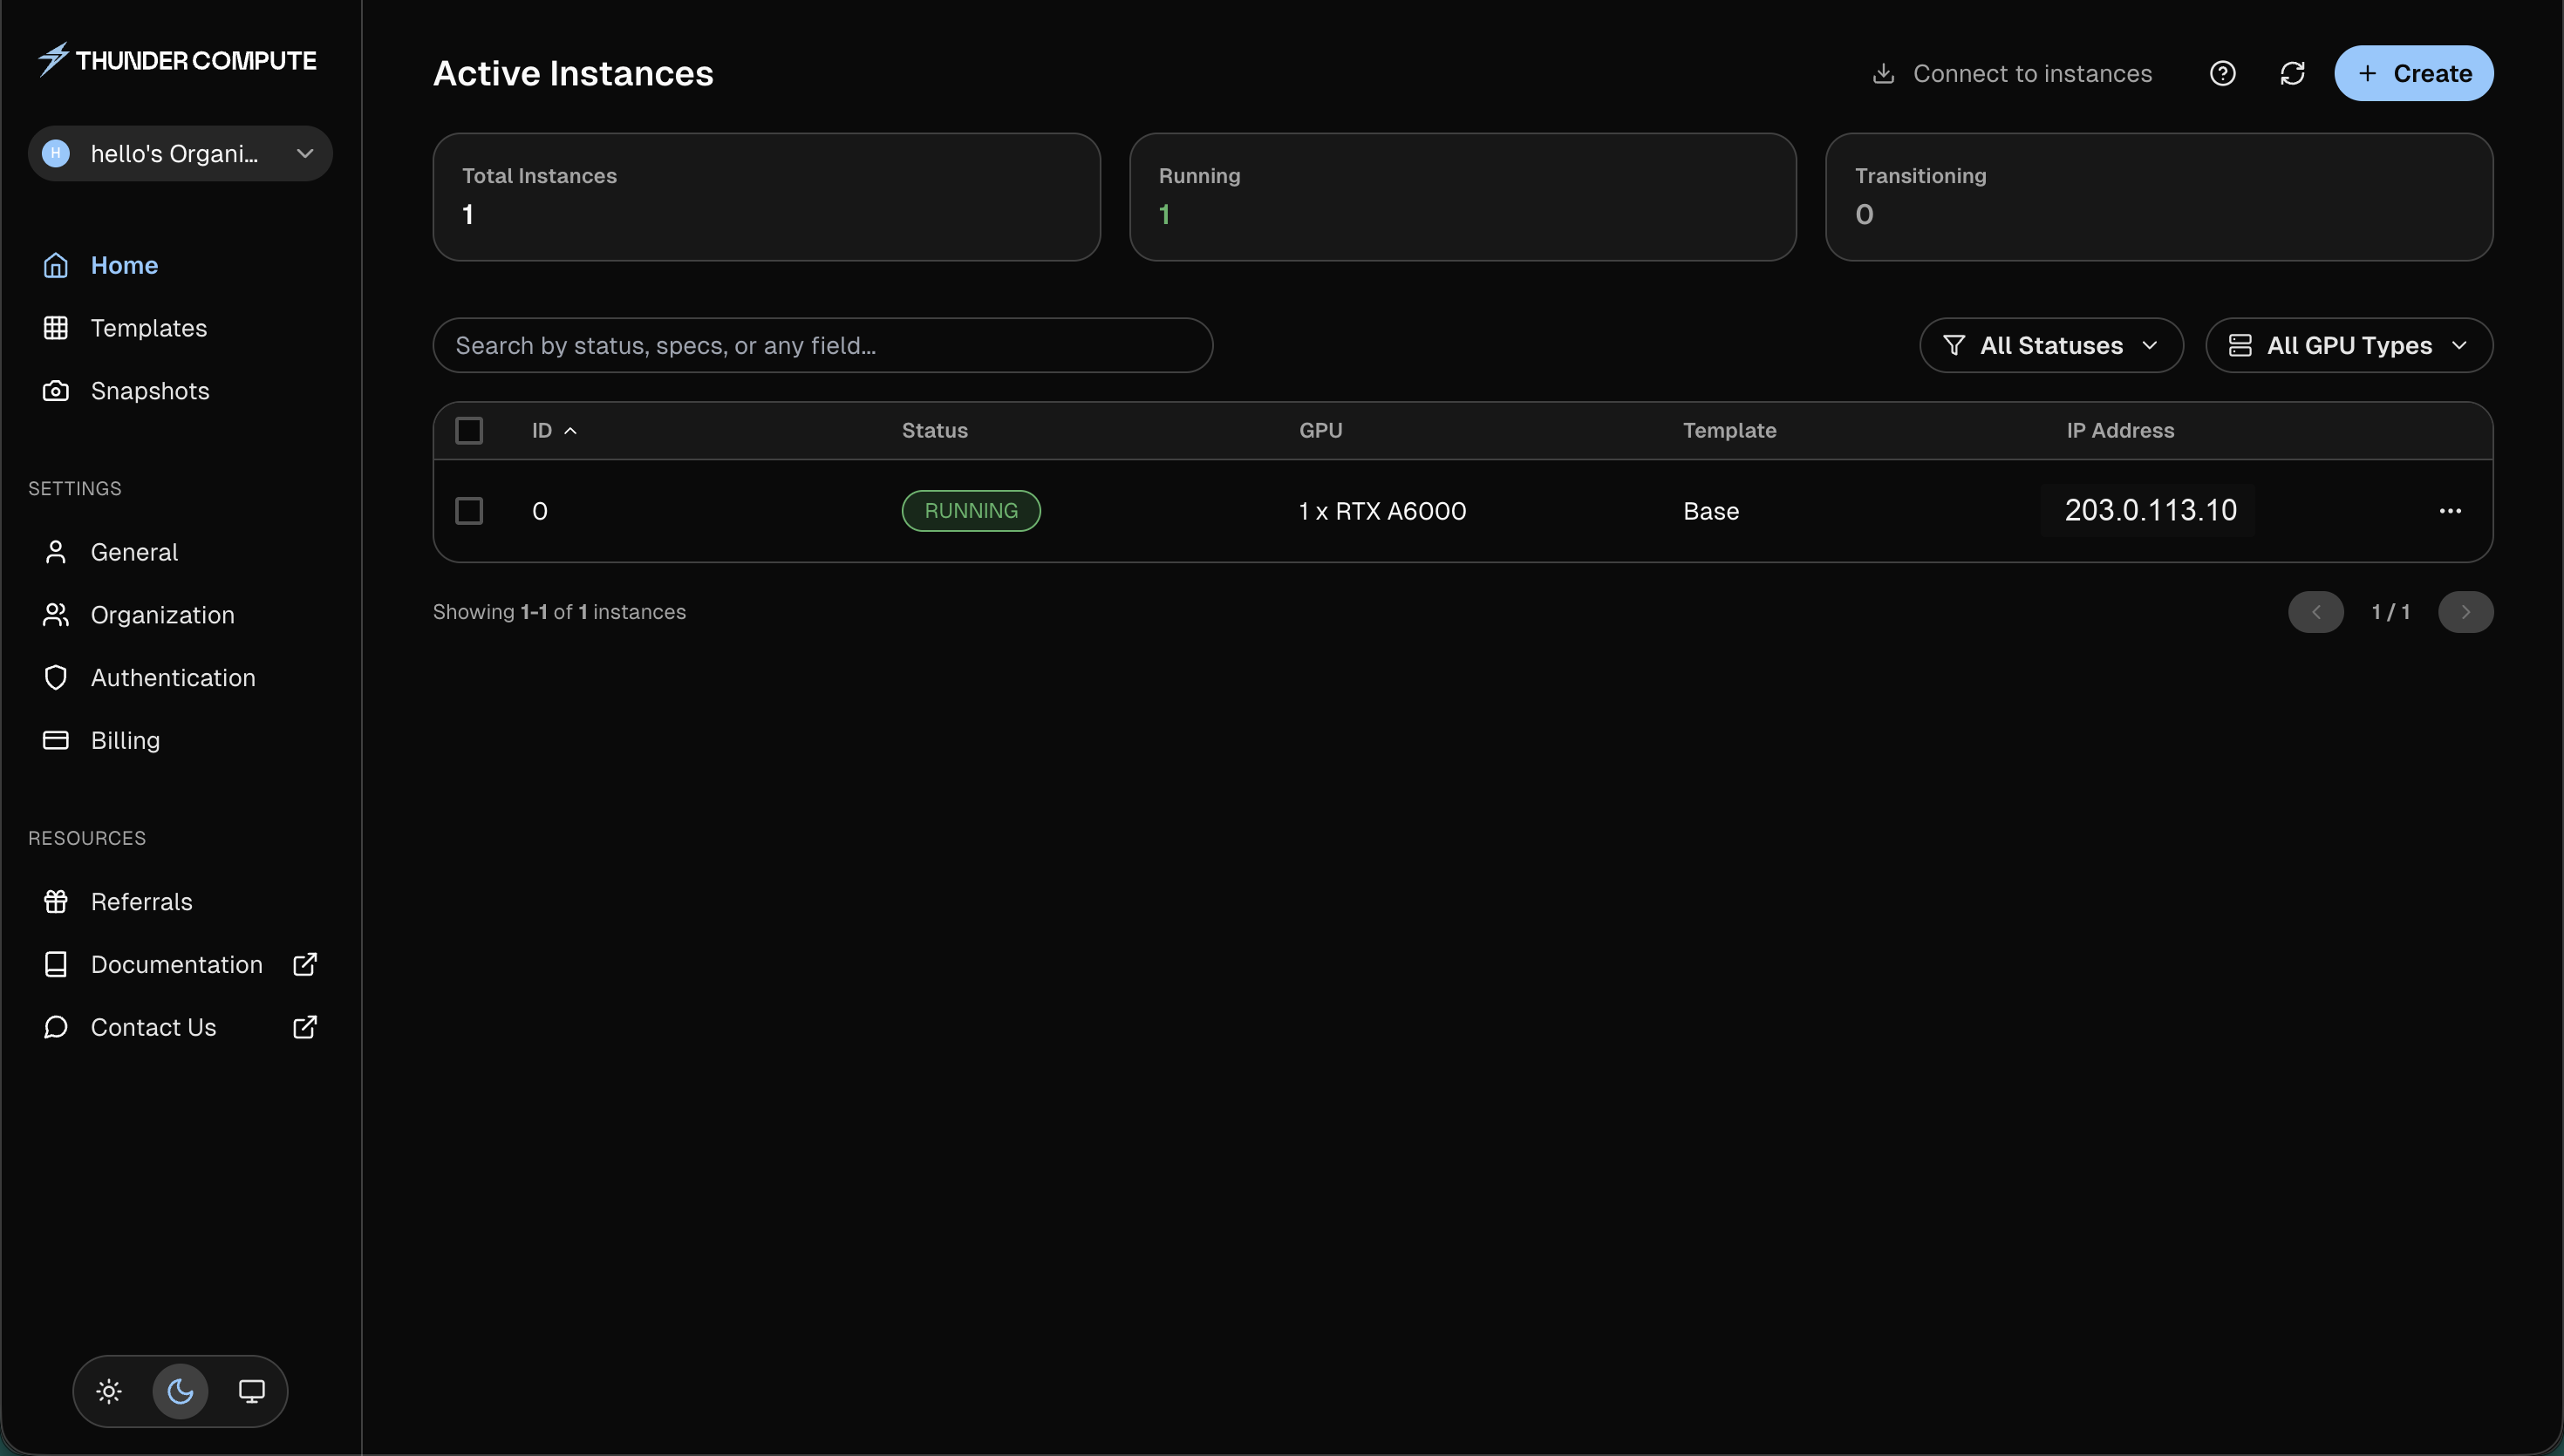 The screenshot uses a documentation IP address. Your console will show the IP address assigned to your instance.
## Connect to Your Instance
Click **Connect to instances** and choose the connection method for your workflow.
The screenshot uses a documentation IP address. Your console will show the IP address assigned to your instance.
## Connect to Your Instance
Click **Connect to instances** and choose the connection method for your workflow.
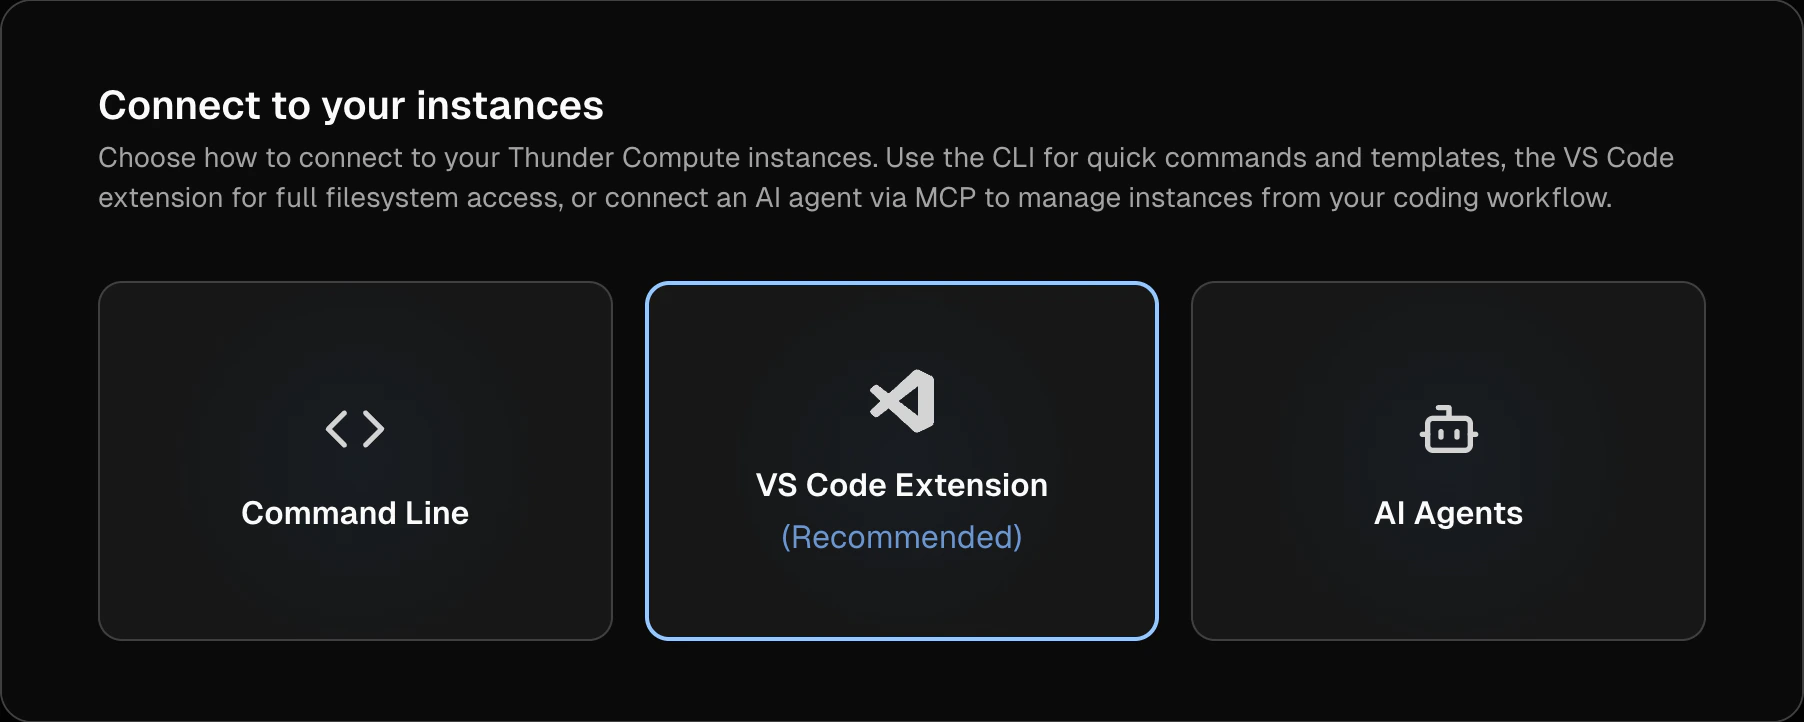 For terminal access, choose **Command Line**, then select your platform and architecture.
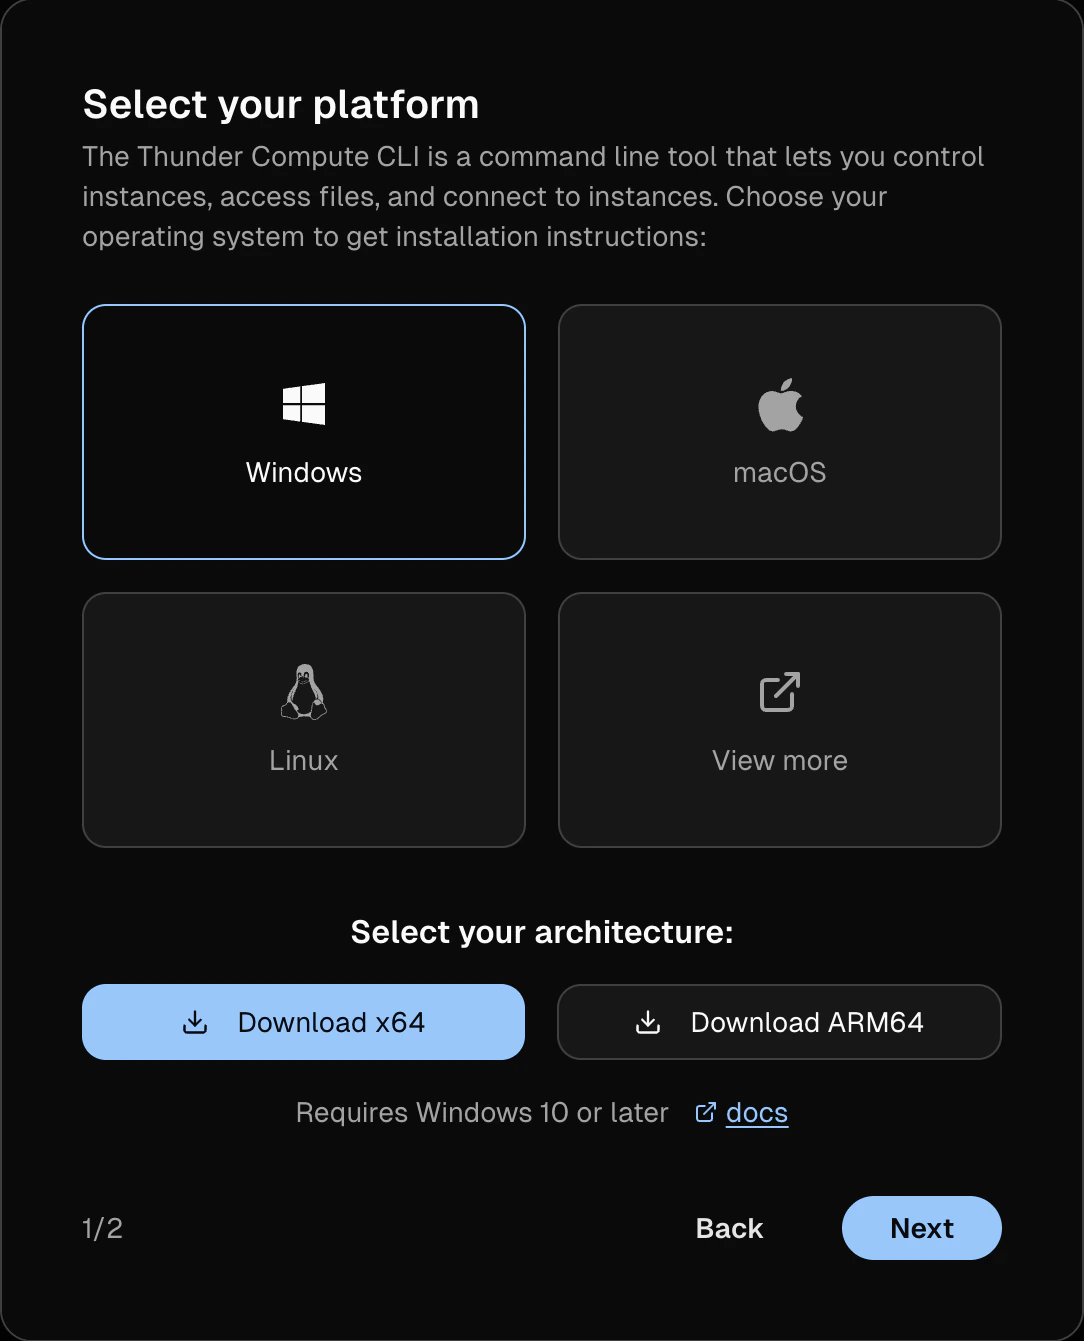 Use the CLI or VS Code extension for the best connection experience with automatic key management:
Single command SSH access
One-click remote development
## Clean Up
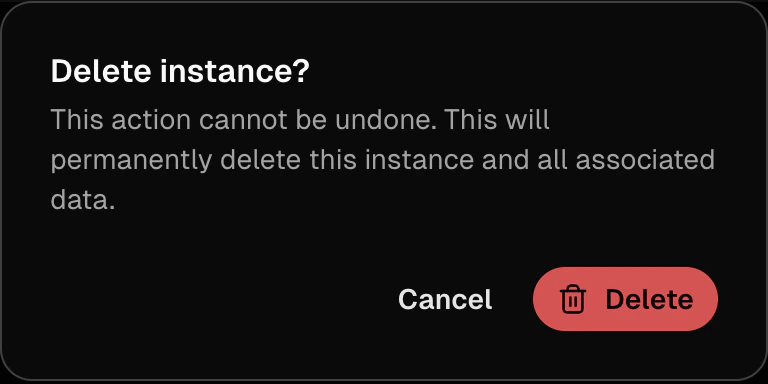
When you are done, open the instance menu, click **Delete**, and confirm the deletion.
Use the CLI or VS Code extension for the best connection experience with automatic key management:
Single command SSH access
One-click remote development
## Clean Up
When you are done, open the instance menu, click **Delete**, and confirm the deletion.