> ## Documentation Index
> Fetch the complete documentation index at: https://www.thundercompute.com/docs/llms.txt
> Use this file to discover all available pages before exploring further.
# Self-host Deepseek R1
> Self-host Deepseek R1 on Thunder Compute cloud GPUs. Local model deployment and configure hardware for optimized inference performance.
## Easily Run DeepSeek R1 on Thunder Compute
Looking for the **cheapest way to run DeepSeek R1** or just want to **try DeepSeek R1** without buying hardware? Thunder Compute lets you spin up pay‑per‑minute A100 GPUs so you only pay for the time you use. Follow the steps below to get the model running in minutes.
> **Quick reminder:** Make sure your Thunder Compute account is set up. If not, start with our [Quickstart Guide](/vscode/quickstart).
If you prefer video instructions, watch this overview:
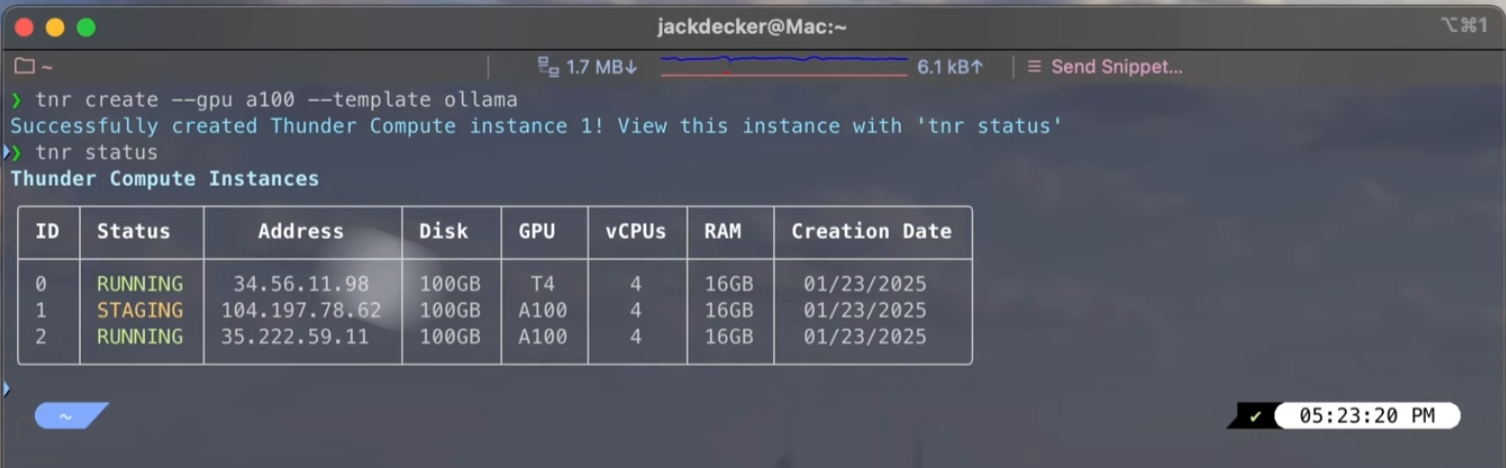
## Step 1: Create a Cost‑Effective GPU Instance
Open your CLI and launch an 80 GB A100 GPU (perfect for the 70B variant):
```bash theme={null}
tnr create --gpu "a100xl" --template "ollama"
```
For details on instance templates, see our [templates guide](/guides/using-instance-templates).
## Step 2: Check Status and Connect
Verify the instance is running:
```bash theme={null}
tnr status
```
Connect with its ID:
```bash theme={null}
tnr connect
```
## Step 3: Start the Ollama Server
Inside the instance, start Ollama:
```bash theme={null}
start-ollama
```
If you run into issues, check our [troubleshooting guide](/troubleshooting).
Wait about 30 seconds for the web UI to load.
## Step 4: Access the Web UI and Load DeepSeek R1
1. Open the Open WebUI URL that `start-ollama` prints. It looks like `https://-8080.thundercompute.net`.
2. Choose **DeepSeek R1** from the dropdown. On an 80 GB A100, pick the **70B** variant for peak performance.
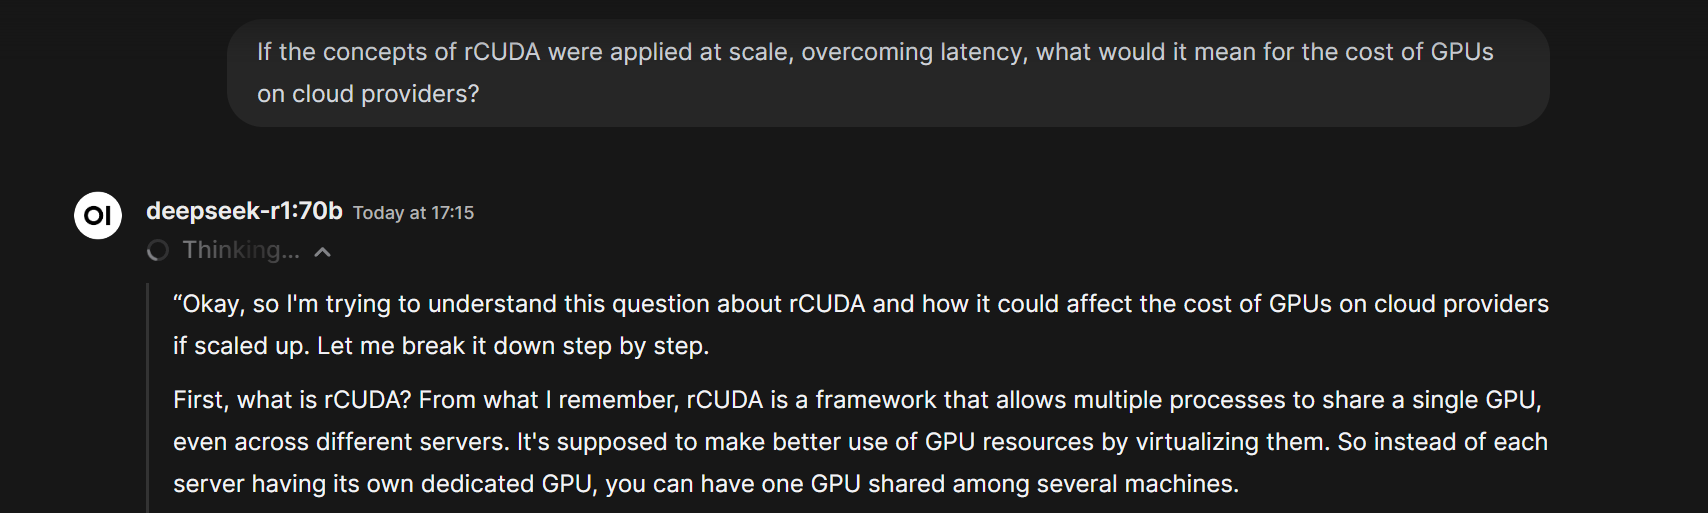
## Step 5: Run DeepSeek R1
Type a prompt in the web interface. For example:
> *"If the concepts of rCUDA were applied at scale, overcoming latency, what would it mean for the cost of GPUs on cloud providers?"*
The model will think through the answer and respond. A full reply can take up to 200 seconds.
## Conclusion
That's the **cheapest way to run DeepSeek R1** and a quick way to **try DeepSeek R1** on Thunder Compute. Explore more guides:
* [Using Docker on Thunder Compute](/guides/using-docker-on-thundercompute)
* [Using Instance Templates](/guides/using-instance-templates)
* [Running Jupyter notebooks](/guides/running-jupyter-notebooks-on-thunder-compute)
Happy building!
 Connect with its ID:
```bash theme={null}
tnr connect
Connect with its ID:
```bash theme={null}
tnr connect 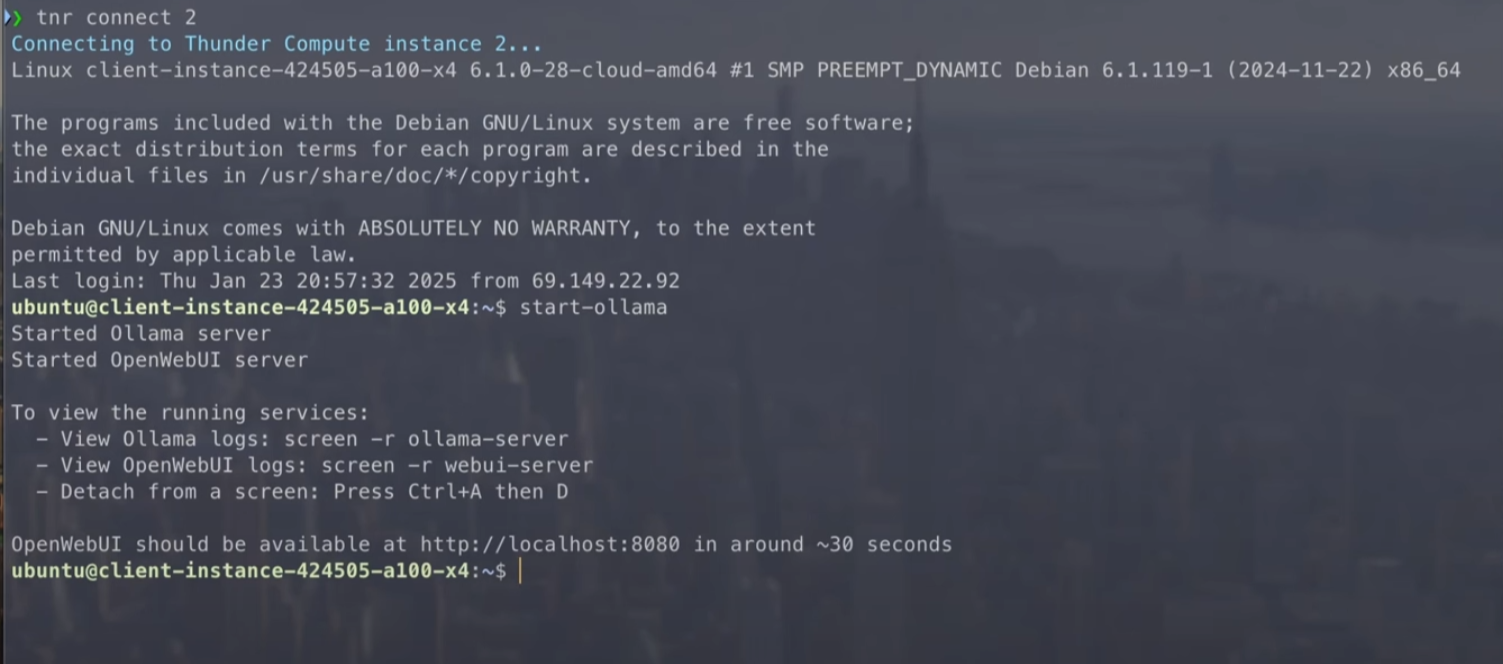 ## Step 4: Access the Web UI and Load DeepSeek R1
1. Open the Open WebUI URL that `start-ollama` prints. It looks like `https://
## Step 4: Access the Web UI and Load DeepSeek R1
1. Open the Open WebUI URL that `start-ollama` prints. It looks like `https://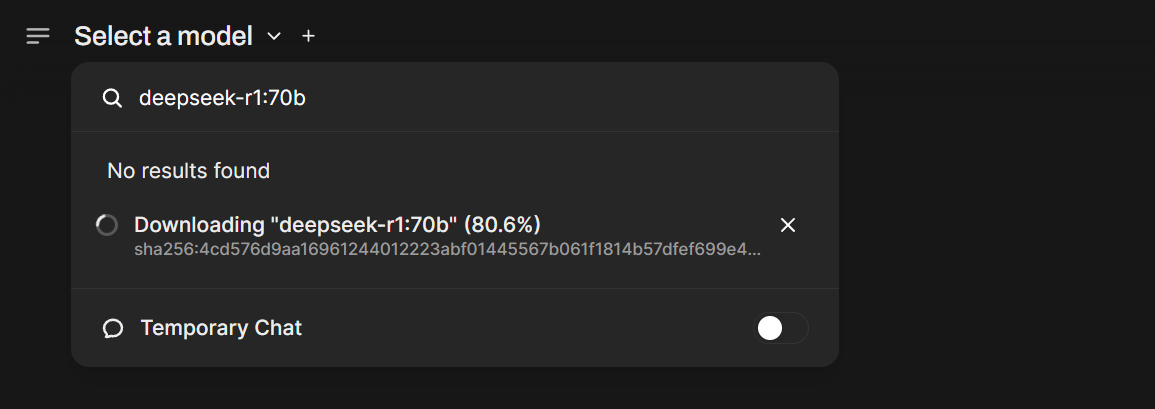 ## Step 5: Run DeepSeek R1
Type a prompt in the web interface. For example:
> *"If the concepts of rCUDA were applied at scale, overcoming latency, what would it mean for the cost of GPUs on cloud providers?"*
The model will think through the answer and respond. A full reply can take up to 200 seconds.
## Step 5: Run DeepSeek R1
Type a prompt in the web interface. For example:
> *"If the concepts of rCUDA were applied at scale, overcoming latency, what would it mean for the cost of GPUs on cloud providers?"*
The model will think through the answer and respond. A full reply can take up to 200 seconds.
 ## Conclusion
That's the **cheapest way to run DeepSeek R1** and a quick way to **try DeepSeek R1** on Thunder Compute. Explore more guides:
* [Using Docker on Thunder Compute](/guides/using-docker-on-thundercompute)
* [Using Instance Templates](/guides/using-instance-templates)
* [Running Jupyter notebooks](/guides/running-jupyter-notebooks-on-thunder-compute)
Happy building!
## Conclusion
That's the **cheapest way to run DeepSeek R1** and a quick way to **try DeepSeek R1** on Thunder Compute. Explore more guides:
* [Using Docker on Thunder Compute](/guides/using-docker-on-thundercompute)
* [Using Instance Templates](/guides/using-instance-templates)
* [Running Jupyter notebooks](/guides/running-jupyter-notebooks-on-thunder-compute)
Happy building!