> ## Documentation Index
> Fetch the complete documentation index at: https://www.thundercompute.com/docs/llms.txt
> Use this file to discover all available pages before exploring further.
# Quickstart
> Configure Thunder Compute using VSCode, Cursor, or Windsurf. Set up your development environment and establish remote connections with this guide.
Editor extension
Command line
Web interface
MCP server
## Installation
Click the following links to access the Thunder Compute extension:
* [VSCode extension](vscode:extension/ThunderCompute.thunder-compute)
* [Cursor extension](cursor:extension/ThunderCompute.thunder-compute)
* [Windsurf extension](windsurf:extension/ThunderCompute.thunder-compute)
You must have already installed the corresponding editor for each link to work.
## Authentication
You may be automatically prompted to login. If not, open the command palette with `Ctrl + Shift + P` (or `Cmd + Shift + P` on macOS) and run `Thunder Compute: Login`.
Your browser will open automatically to complete authentication.
## Add a Payment Method
In the console, [add a payment method](https://console.thundercompute.com/settings/billing) to your account.
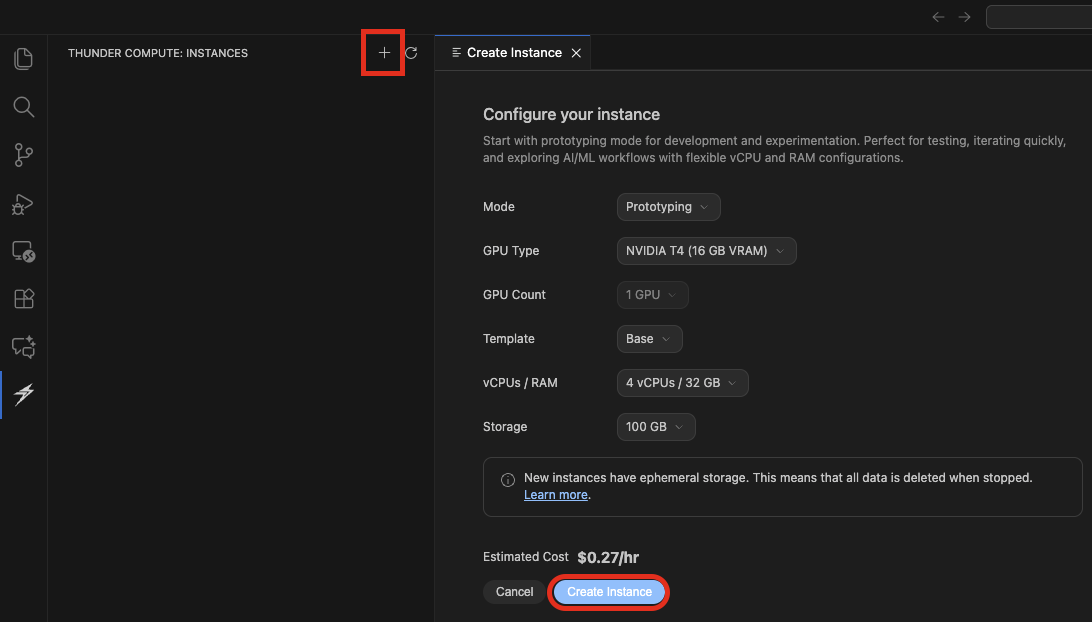
## Using The Extension
You can create instances through the [console](https://console.thundercompute.com) or directly through the extension like so:
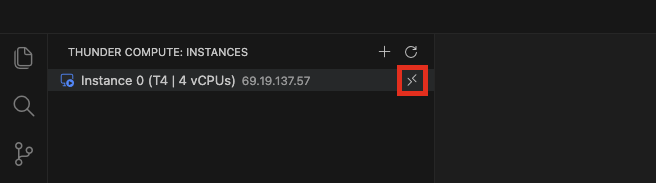
 Click on the `Connect` button next to your instance, shaped like two arrows pointing towards each other.
 If connecting to the instance fails, check that you have the remote-ssh extension installed on your editor.
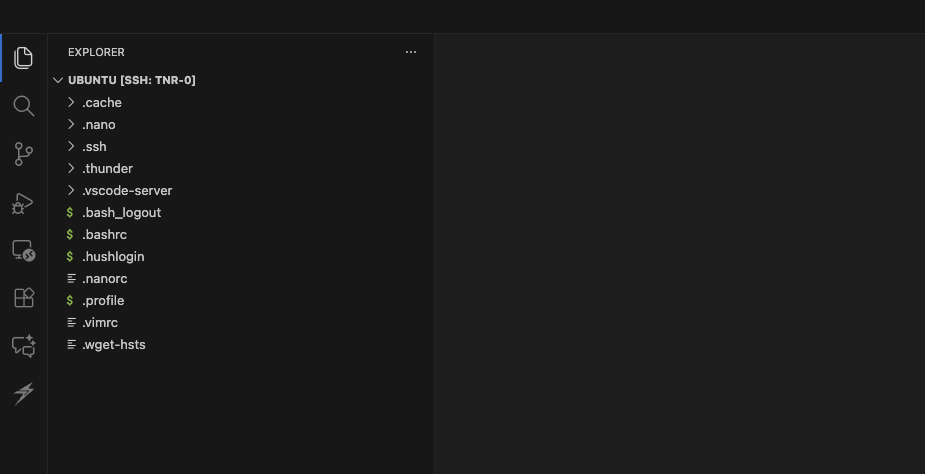
A new window will open connected to your instance. You can drag files you need into the file explorer, run notebooks, scripts, and more as if they were on your local machine.
If connecting to the instance fails, check that you have the remote-ssh extension installed on your editor.
A new window will open connected to your instance. You can drag files you need into the file explorer, run notebooks, scripts, and more as if they were on your local machine.
 That's it! You're now ready to use Thunder Compute.
## Next Steps
* Learn about [Development vs Production](/development-vs-production) to choose the right mode for your workload
* Explore [Technical Specifications](/technical-specs) for hardware, networking, and storage details
* Learn how to [transfer files](/vscode/operations/file-transfers), [create snapshots](/vscode/operations/snapshots), and more in the Operations section
* Learn how to [Run a Jupyter Notebook](/guides/running-jupyter-notebooks-on-thunder-compute)
That's it! You're now ready to use Thunder Compute.
## Next Steps
* Learn about [Development vs Production](/development-vs-production) to choose the right mode for your workload
* Explore [Technical Specifications](/technical-specs) for hardware, networking, and storage details
* Learn how to [transfer files](/vscode/operations/file-transfers), [create snapshots](/vscode/operations/snapshots), and more in the Operations section
* Learn how to [Run a Jupyter Notebook](/guides/running-jupyter-notebooks-on-thunder-compute)