Unsloth Studio is a browser UI for running and training local models. This guide uses the official Linux installer on a Thunder ComputeDocumentation Index
Fetch the complete documentation index at: https://www.thundercompute.com/docs/llms.txt
Use this file to discover all available pages before exploring further.
base instance, then exposes Studio through Thunder Compute port forwarding.
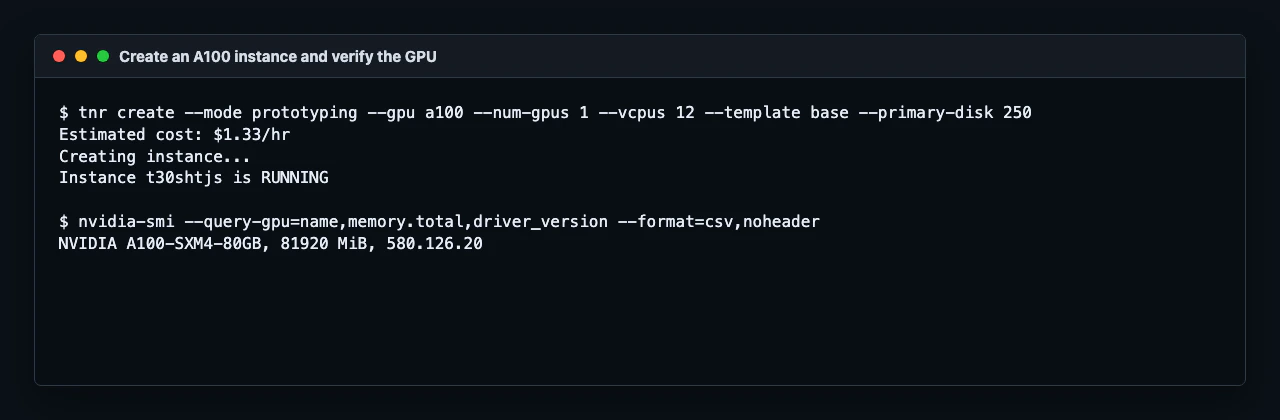
These commands were verified on a single A100 80 GB prototyping instance. The same setup path is suitable for other GPU instances with enough disk space for the models and datasets you plan to use.
Create the instance
Create a GPU instance with thebase template and enough primary disk for Studio, models, and datasets:
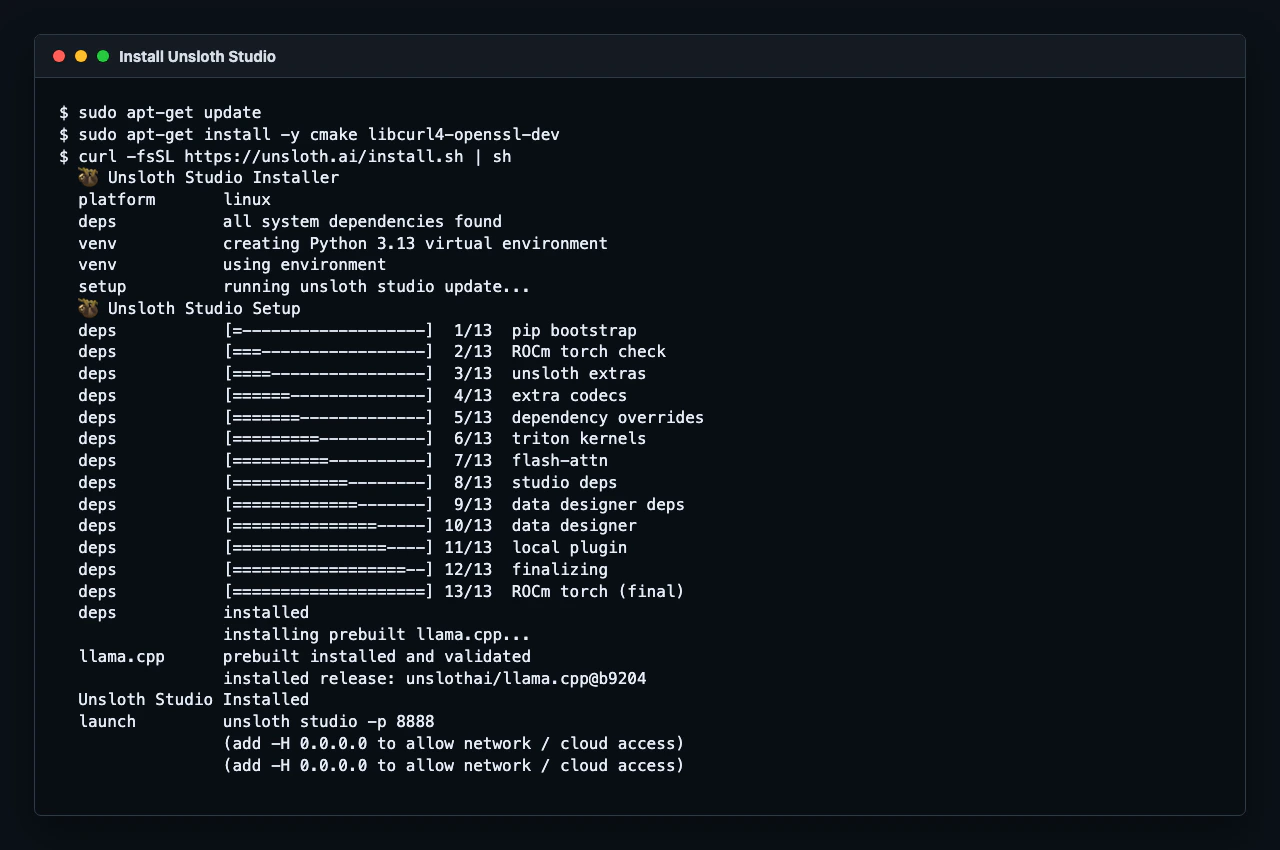
Install Unsloth Studio
Install the system packages that Unsloth Studio needs to build and run its local inference components:~/.unsloth/studio and writes an unsloth launcher into ~/.local/bin.
For the current SSH session, add the launcher directory to your path:
Start Studio
Start Unsloth Studio on port8888 and listen on all interfaces:
"status":"healthy".
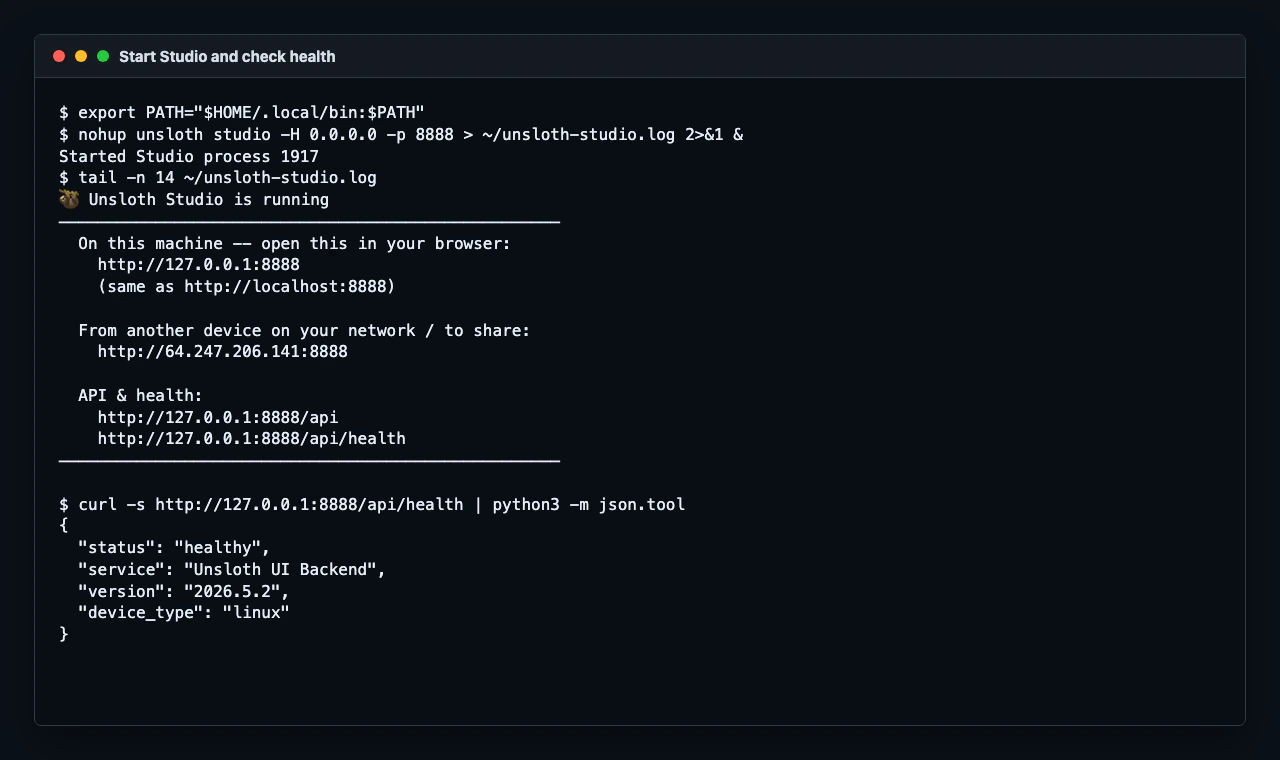
curl -I http://127.0.0.1:8888 may return 405 Method Not Allowed because Studio does not accept HEAD requests on /. Use curl http://127.0.0.1:8888 or /api/health instead.Get the admin password
On first launch, Studio creates a default admin user namedunsloth.
Read the generated bootstrap password from the instance:
Open Studio in your browser
From a second terminal on your local machine, forward port8888:
| Field | Value |
|---|---|
| Username | unsloth |
| Password | The value from ~/.unsloth/studio/auth/.bootstrap_password |
Stop Studio
Stop the Studio process when you are done using it:Docker Note
Unsloth also publishes an officialunsloth/unsloth Docker image. Thunder Compute supports Docker with the --device nvidia.com/gpu=all flag, but Docker support is experimental because the instance itself is already containerized.
Use the native installer above for the first Studio setup.